 AZ TOOLS

AZ Wrinkle UI
Wrinkles that appear where the skin compresses and vanish when it relaxes: a deformer after the skin, a painted mask for where, and sliders for how.
- Rigging
- Version 1.8.5
- Maya 2023 – 2027
- Windows
- Licensed
- Plug-in: Wrinkle MLL (free)
What it does
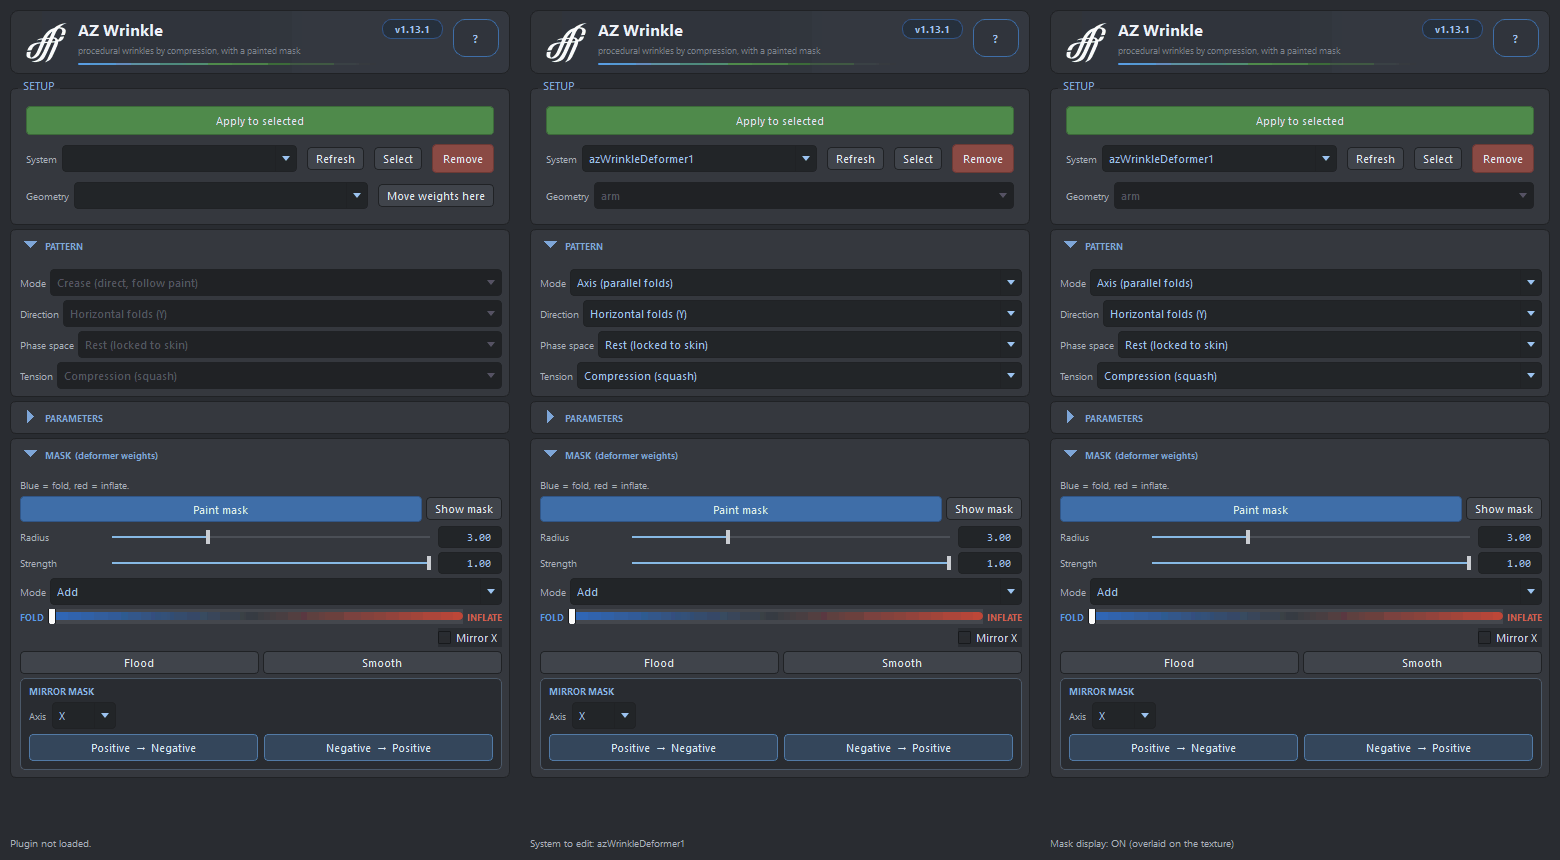
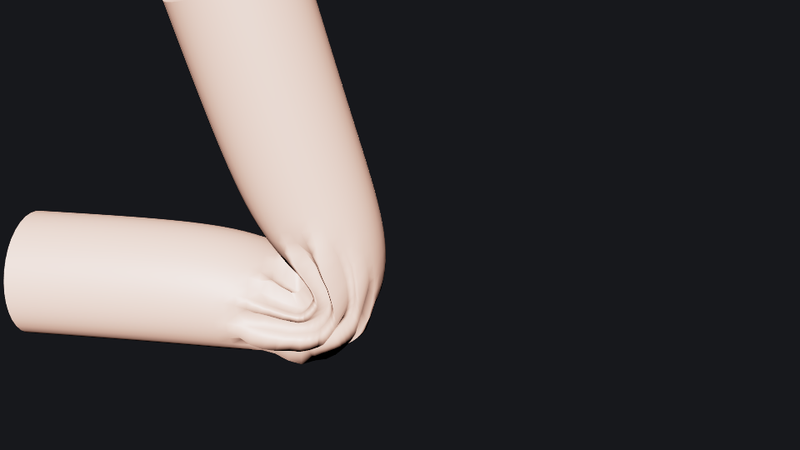
Select a skinned mesh and press Apply to selected. The deformer sits after the skinCluster and compares the posed mesh with the bind mesh: wherever the surface is compressed inside the painted mask it folds into grooves (blue mask) or inflates outward (red mask). Nothing is keyed; the effect is driven by the pose.
The mask is painted with a brush right in the viewport, with Add, Replace, Erase and Smooth modes, mirroring while painting, and flood for the whole mesh. The deformation itself is the free AZ Wrinkle MLL plug-in, so scenes open anywhere.
Workflow
- Select a skinned mesh and press Apply to selected. The rest mesh is connected to the mesh's Orig shape with the same vertex count.
- Switch Show mask on, set the brush Strength and press Flood to fill the whole mask, or paint the zones with Paint mask: blue folds, red inflates.
- Keep Threshold above zero (0.03 is a good start) so the mesh stays clean at rest and the effect appears under compression. Threshold 0 shows the pattern everywhere as a preview.
- Pick the pattern Mode: Crease follows the brush shape directly, no waves; Mask, UV and Axis lay many parallel ridges across the painted zone.
- Tune depth, inflation, frequency, contrast and the rest while scrubbing the pose; edits are live.
The window
- Setup
- Apply to selected loads the plug-in if needed and creates the deformer; the System list picks an existing deformer and its geometry.
- Wrinkle depth / Inflate amount
- Depth of the fold grooves (blue mask) and height of the skin bulge (red mask).
- Frequency / Contrast
- Number of parallel ridges across the zone; sharpness of the compression gate, crisper above 1, softer below.
- Tension smooth / Threshold
- Smoothing of the compression field over neighbours; the compression needed before the effect appears.
- Phase shift / Gather / Bias
- Slide the ridges along their direction (animatable), gather the skin tangentially into folds, balance ridges against grooves.
- Relief smooth / Noise
- Smooth the finished relief without blurring the mask; blend fbm noise into the ridges so they look organic.
- Brush & mask
- Fold ↔ Inflate polarity, Mode (Add / Replace / Erase / Smooth), Radius, Strength, Flood, Smooth, Mirror X while painting, mirror an existing mask across an axis.
How it works
- Compression from the bind pose. The deformer measures how much each region of the posed mesh has shrunk compared with the rest mesh. That field, smoothed over neighbours and gated by the threshold, is what drives the wrinkles, so they belong to the pose and not to a frame.
- A signed mask. One painted value per vertex: negative for folds, positive for inflation, zero for nothing. The brush is a C++ paint context with Shift to smooth, Ctrl to invert and middle-drag for the radius.
- Pattern over a coherent phase. In the procedural modes the ridges are a sine wave laid over the zone along the mask, the UVs or an axis, with optional noise; Crease uses the brush shape itself.
- After the skin, before the rest. The node sits at the end of the chain after the skinCluster, and plays with AZ Contact Deformer and AZ Curvenet on the same mesh.
Good to know
- The plug-in is a separate, free package, AZ Wrinkle MLL, with native binaries for Maya 2023, 2025, 2026 and 2027 and a Python fallback for 2024. Install it on every machine that opens the scene.
- Threshold 0 is a preview, not a rest state: the pattern is always visible. Raise it before you hand the rig over.
- Flood writes the mask directly, so it works even where the paint tool cannot start.
- Mirror the mask in the bind pose: pairing is by position across world X.
Availability
AZ Wrinkle UI is a licensed product of AZ Tools, in the Rigging category. It is listed in the AZ Tools Manager for every account and installs once a license key is activated. The deformer it edits, AZ Wrinkle MLL, is free for every registered account.
Get AZ Tools Manager