 AZ TOOLS

AZ Rope Rig
A complete rope, cable or tail rig from one curve, in one button: controls, joints, skin, twist, stretch, and an optional dynamics layer where the controls stay the masters.
- Rigging
- Version 2.12.3
- Maya 2023 – 2027
- Windows
- Licensed
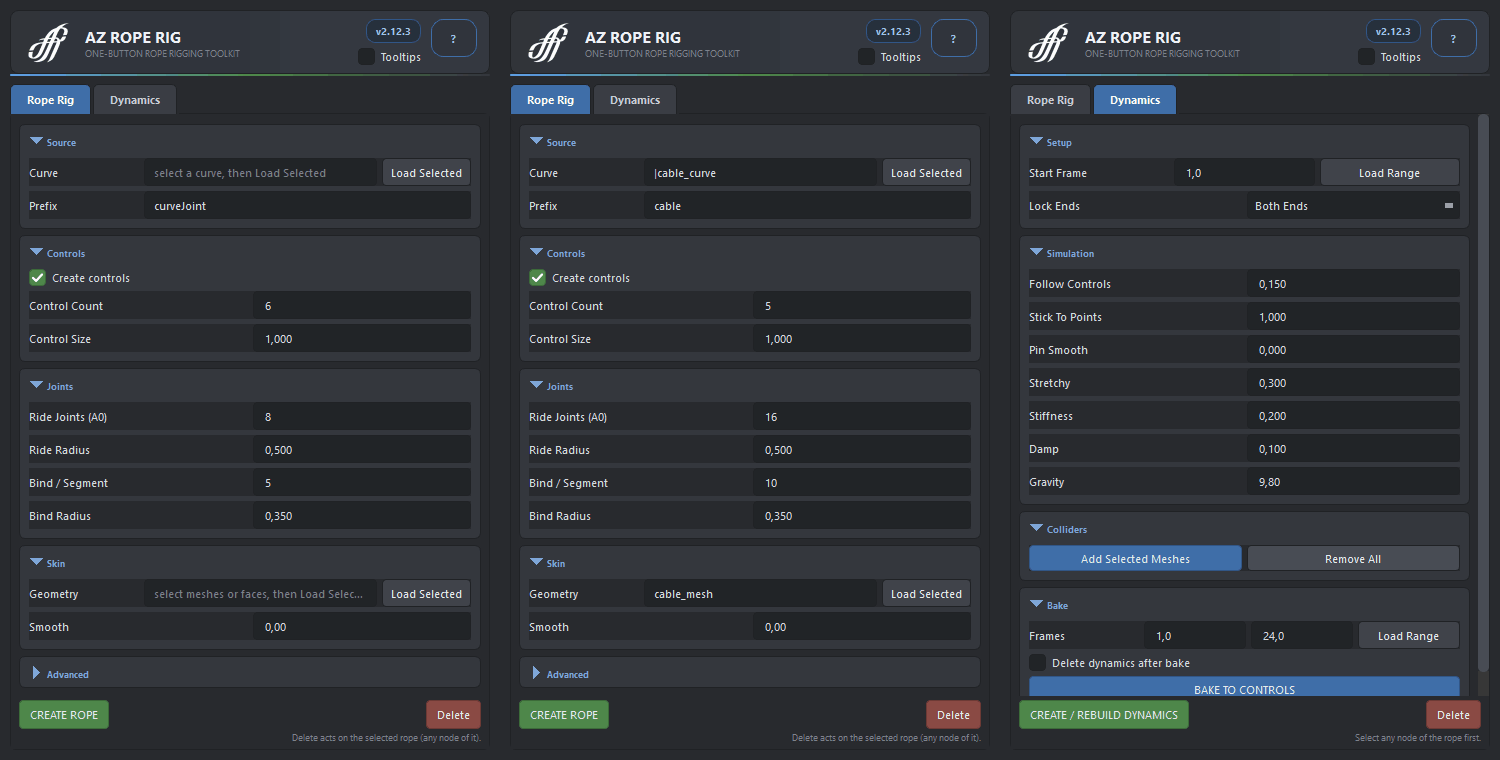
What it does
Select a NURBS curve, give the rope a prefix, press CREATE ROPE. You get position controls with tangent handles along the curve, ride joints as the spine, bind joints per segment for skinning, stretch, a stable up vector along the whole rope, and an end-to-end twist. Load a mesh into Skin and it is bound to the rope in the same step.
Dynamics is a separate layer added afterwards: one nHair simulation for the whole rope that follows the controls instead of replacing them. Blend it in, bake it back onto the controls, or delete it and the plain rig is back.
Workflow
Rope Rig tab
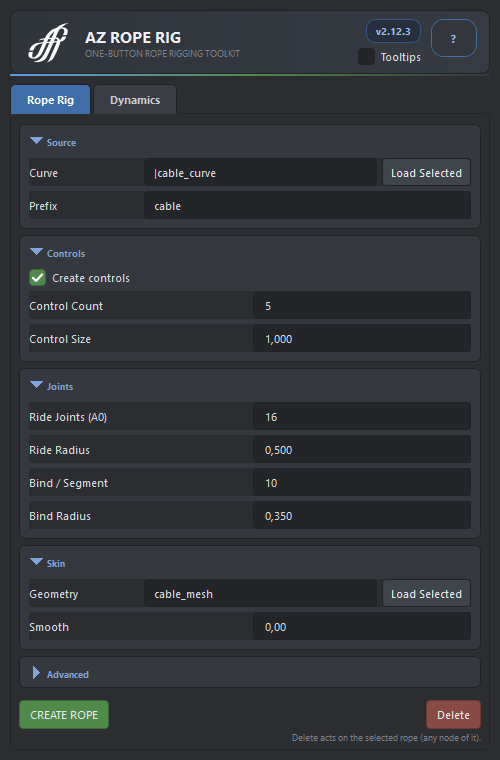
- Curve. Select the NURBS curve and press Load Selected. Prefix names every node of this rope, so use a unique prefix per rope.
- Skin (optional). Select meshes, or faces and vertices, and press Load Selected. On CREATE ROPE they are bound to the bind joints ribbon-style along the rope. A mesh that already has a skinCluster keeps it; only the chosen vertices move to the rope.
- Controls. The curve is rebuilt through Control Count anchors. Each anchor gets a T0 position control with T1 / T2 tangent handles that shape the sag of every span.
- Joints. Ride joints are the spine along the whole rope; bind joints are created per segment for skinning. Isolate segments gives every span its own curve so bind joints do not bleed across controls.
- Press CREATE ROPE. Everything is built in one undo step.
Dynamics tab
- Select any part of the rope and set Start Frame.
- Choose which ends the solver pins (Lock Ends), how hard the simulation tracks the controls (Follow Controls), whether it sticks to every control point, and the slack (Stretchy), stiffness, damping and gravity.
- Press CREATE / REBUILD DYNAMICS. Add colliders with Add Selected Meshes.
- When the motion is right, set the frame range and press BAKE TO CONTROLS: the simulated rope is keyed onto the T0 controls and their handles, and the dynamics blend drops to zero.
Twist and length live on the rig, not in the window. Rotate the first or last T0 control around the rope for an end-to-end twist (AzTwistAmount, AzTwistMode); rotate a middle control to twist its own zone. On the setup group AzStretch 1 follows the controls, 0 keeps the rest length, and AzStretchAnchor picks which end stays put.
Dynamics
The dynamics layer makes the rope move on its own, under the animation, without taking the rope away from the animator: the controls stay the masters, the simulation follows them, and the blend between the two is one slider.
What it is
- One simulation for the whole rope. The smooth master curve of the controls feeds a hidden goal curve; a single nHair follicle simulates it. Start-curve attraction keeps pulling the simulation back towards the controls, so the rope never drifts away from the pose; interior controls attract rather than weld, so there are no sharp corners.
- The rig is untouched. The simulated curve drives every riding curve through one wire deformer. Motion paths, stretch, twist and the bind joints keep reading the same curves they always did, so skin and joints simply follow.
- Everything on one control. A dedicated
AZ_DYN_<prefix>_CTRLappears next to the rope with the animator-facing parameters:AzDynBlend(0 = pure controls, 1 = full dynamics),AzFollowControls,AzStiffness,AzDamp,AzGravity,AzStartFrame,AzPointLock,AzPinSmooth. They can be keyed like any other attribute.
Using it
- Select any node of the rope, set Start Frame (the frame the rope is at rest) and press CREATE / REBUILD DYNAMICS. Rebuild replaces an existing setup with the new settings.
- Lock Ends chooses which ends the solver pins: both, start, end or none. A hanging cable pins both; a tail pins the start only.
- Follow Controls is how hard the simulation tracks the animated controls (0 free, 1 glued). Stick To Points pins the rope to every control point so it only sags between them; Pin Smooth softens those pins for taut poses.
- Stretchy is the slack: 0 holds the rest length, 1 is floppy. Stiffness resists bending, Damp settles the motion, Gravity pulls it down.
- Select meshes and press Add Selected Meshes to make them colliders; Remove All clears them.
- When the motion is right, set the Bake range and press BAKE TO CONTROLS: the simulated rope is keyed onto the T0 controls and their tangent handles, the blend drops to zero, and the result plays everywhere without nHair. Tick Delete dynamics after bake to remove the setup in the same step.
Works on referenced rigs. Only the rope's setup group is needed: all new nodes are scene-local, attribute edits on referenced nodes become reference edits, and world-space goal and simulation curves keep the dynamics correct when the whole prop moves. Delete on the Dynamics tab restores the plain control-driven rig.
The window
- Source
- Curve the rope is built on and the Prefix for every node of this rope.
- Skin
- Geometry: meshes or components to bind on create, several entries separated by commas. Smooth post-smooths the rope weights (0 = exact linear split between the two nearest bind joints).
- Controls
- Control Count anchors along the curve and Control Size in scene units.
- Joints
- Ride Joints spread along the whole rope on motion paths, Bind / Segment joints between neighbouring controls, display radii, tangent following, doubled-border skipping and segment isolation.
- Advanced
- Rigger settings: stretch default, front and up axes, closed-curve spacing, motion-path attach. Leave it collapsed for a normal rope.
- CREATE ROPE / Delete
- Create builds the whole rope in one undo step. Delete removes the selected rope, its dynamics, twist and bind joints, and restores the curve.
- Dynamics · Setup
- Start Frame of the simulation and Lock Ends.
- Dynamics · Simulation
- Follow Controls (0 free, 1 glued), Stick To Points, Pin Smooth for taut poses, Stretchy, Stiffness, Damp, Gravity.
- Dynamics · Colliders / Bake
- Add or remove collider meshes; bake a frame range onto the controls, optionally deleting the dynamics afterwards.
How it is built
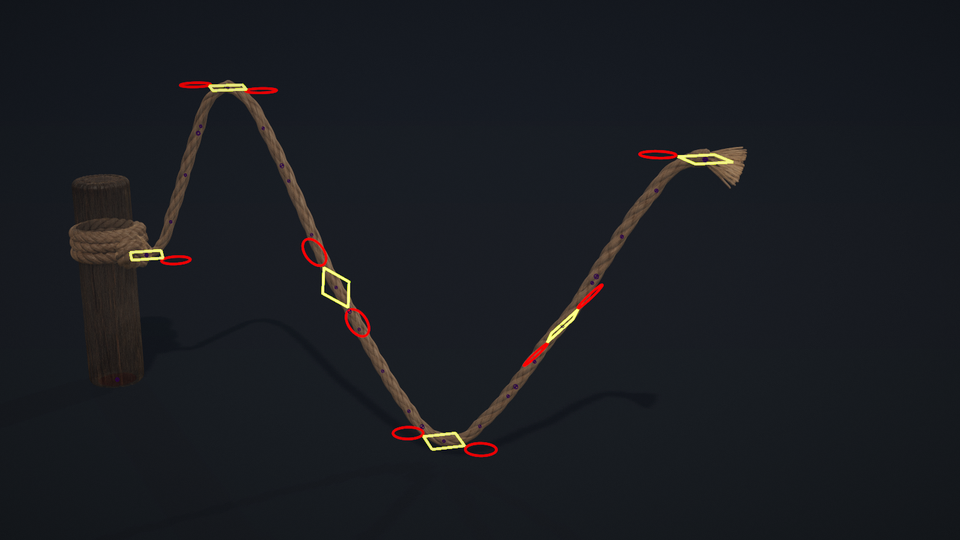
- Controls. The curve is rebuilt through the anchors. Each T0 control carries two tangent handles; together they define a smooth master curve, and every span between two controls gets its own riding curve when segments are isolated.
- Joints. Ride joints follow the master curve on motion paths with a stable up vector along the whole rope, so nothing flips when the rope bends or hangs. Bind joints ride the segment curves and are the joints the skin is bound to.
- Twist, follow and aim. The twist between the first and last control is distributed along the length; middle controls can twist their own zone, ride evenly between the ends (
AzFollowEnds) or turn with the line between the ends (AzAimEnds). All off by default. - Dynamics. The master curve feeds a hidden goal curve; a single nHair follicle simulates it, pulled back towards the controls, and the simulated curve drives every riding curve through one wire deformer. Motion paths, stretch and bind joints keep reading the same curves, so the rig itself is untouched. Every parameter lives on the
AZ_DYN_*_CTRLcontrol next to the rope, withAzDynBlendfrom 0 (controls only) to 1 (full dynamics). - Referenced rigs. Dynamics can be added to a rope loaded as a reference or moved inside a prop hierarchy: all new nodes are scene-local, and attribute edits become reference edits. Deleting the dynamics restores the original rig.
Good to know
- Build and update in the rig's rest pose, with a clean curve. The curve's transforms are frozen as part of the build.
- One rope, one prefix. Two ropes with the same prefix end up sharing names.
- Pull the ends closer together than the rope's rest length and it has to sag: that is what the Dynamics tab with Stretchy 0 is for.
- Baking keys the T0 controls and their tangent handles only; the ride and bind joints keep reading the curves, so a baked rope stays editable.
- Delete acts on the selected rope: any node of it will do.
Availability
AZ Rope Rig is a licensed product of AZ Tools, in the Rigging category. It is listed in the AZ Tools Manager for every account and installs once a license key is activated. A rigged rope uses standard Maya nodes and nHair only, so a scene built with it opens anywhere without the tool.
Get AZ Tools Manager